Getting the Build Back into Full Swing
Finishing the dinette benches and platform, learning to sew cushion covers, and polishing up the early cabinets
It’s been a year and a half since I graduated college and decided I wanted to hit the road in a converted cargo van. I’d gotten it into my head (and I’m totally going to blame all those time-lapse YouTube vids) that converting a van would be quick and easy, and I could buy a van, convert it, and be living the dream in a few months.
The truth is, that’s doable. You could probably get a van together in as little as a week — so long as you’re willing to toss an air-mattress, ice chest, water jug, and camp stove in the back and call it good.
The road is whatever you make of it. That’s something I’ve learned already, just from working through the build, my trip up to Alaska, and listening to the stories of other vanlifers on podcasts and social media. If the most important thing is just getting out there, you don’t need any bells and whistles. And some days I wish I’d kept it simple. I could have been living on the road for months now, if I’d gone with something more basic.
But I don’t think I would have been happy with that. Sure, I would have been traveling, but this is more than a trip to me. It’s about building a lifestyle, and I think that’s easier to do when my surroundings feel like a home. It may have taken a lot longer than I planned, but looking back, I think it’s worked out for the best. And now that I’ve got the important parts nearly finished and am looking towards the official start of this adventure, I’m glad I did things the way that I have. Danica feels more like home every day, and I can already see my vision coming to life.
Finishing the Benches

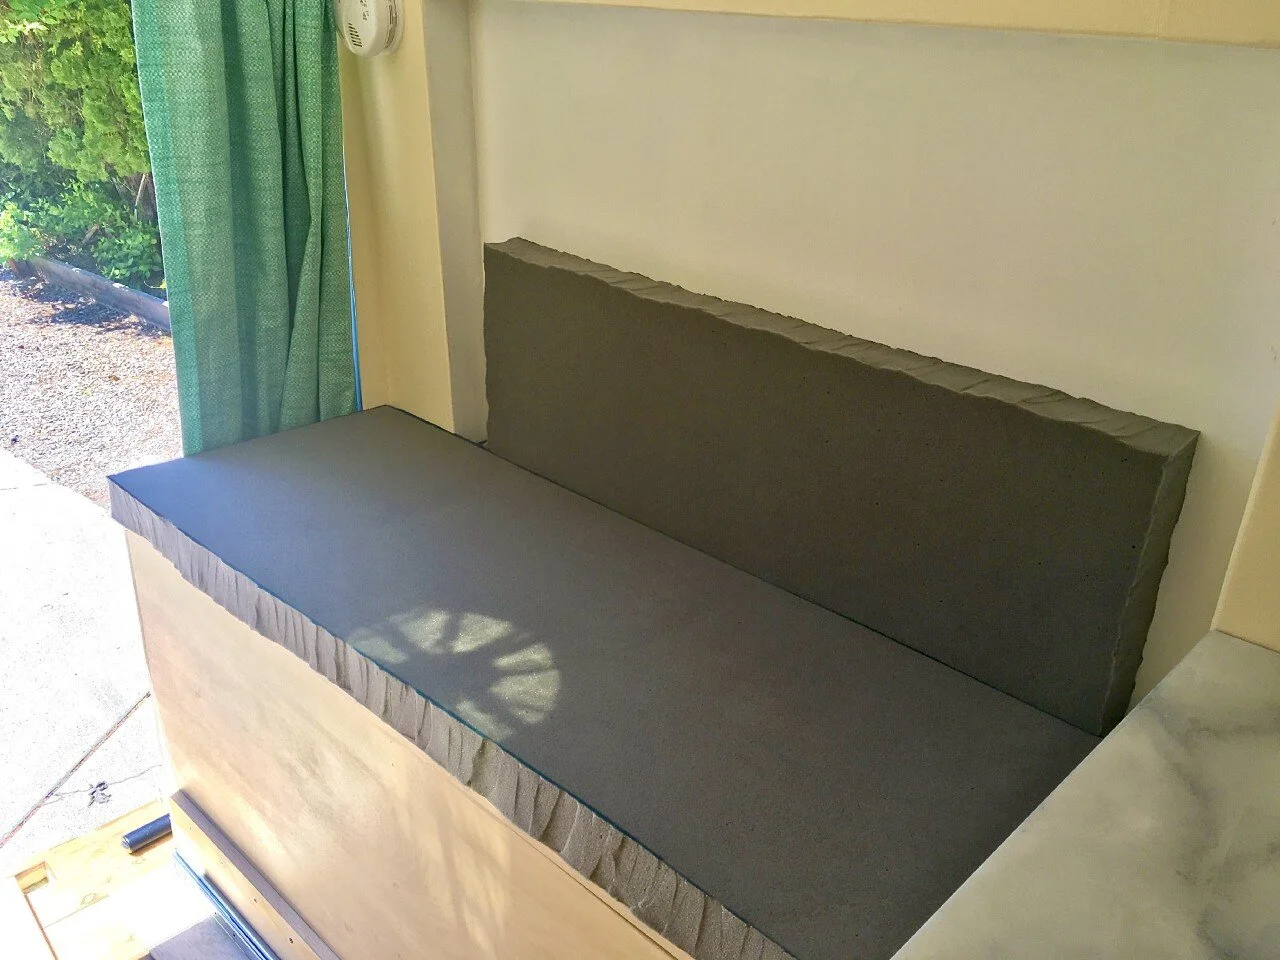
View from the back after both side benches were officially installed
In my last post, I showed some of the process building the first bench. Unfortunately, I was slacking and don’t have many pictures of the passenger-side bench coming together.
Quick Version: We started by cutting out the bottom and three sides, and then scribed the bottom to go around the wheel well and the sides to match the curve of the walls. Next, we nailed the plywood pieces together. Then I built a cover for the wheel well out of leftover 1/4" plywood, and attached it to the bench. Finally, the plywood supports went in using pocket screws (Super Dad bought a special jig to make pocket holes) and then the whole thing was sanded down and screwed into the floor and wall.
I was pretty happy to get that second bench in. It almost felt like summiting a mountain, to me. With that finished, it finally felt like I’d finished more of the build than there was left to do. Plus, I could really see the layout coming together, and the space felt like it had more structure.

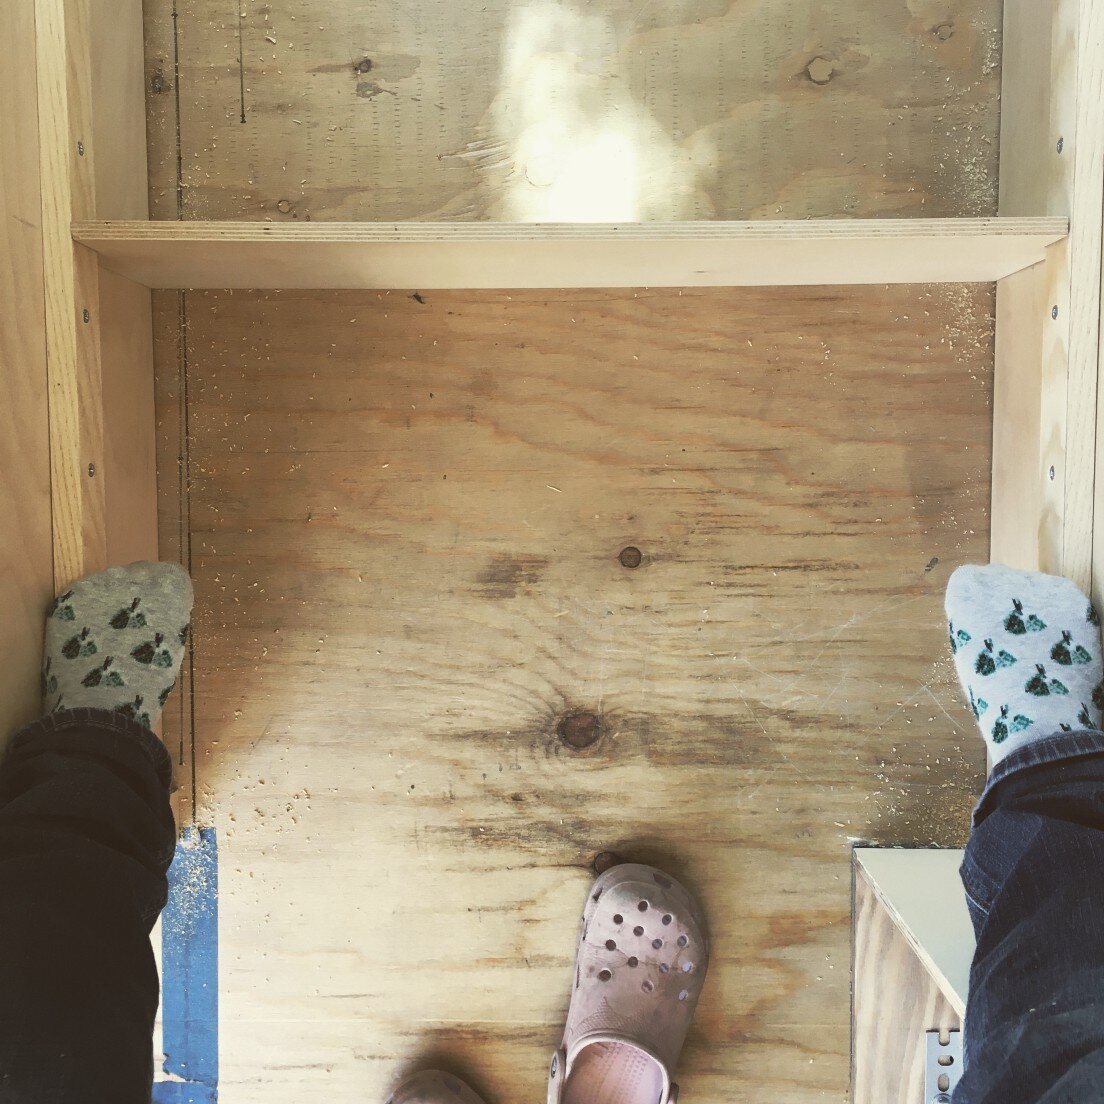
I took the opportunity to practice my standing-on-narrow-ledges skills in case I ever decide to go on Survivor.
The next step was to install the supports for the back bench and platform that the table is going to sit on. I divided the space in order to have a large drawer going out the back and a storage space accessible from inside the van in the front.
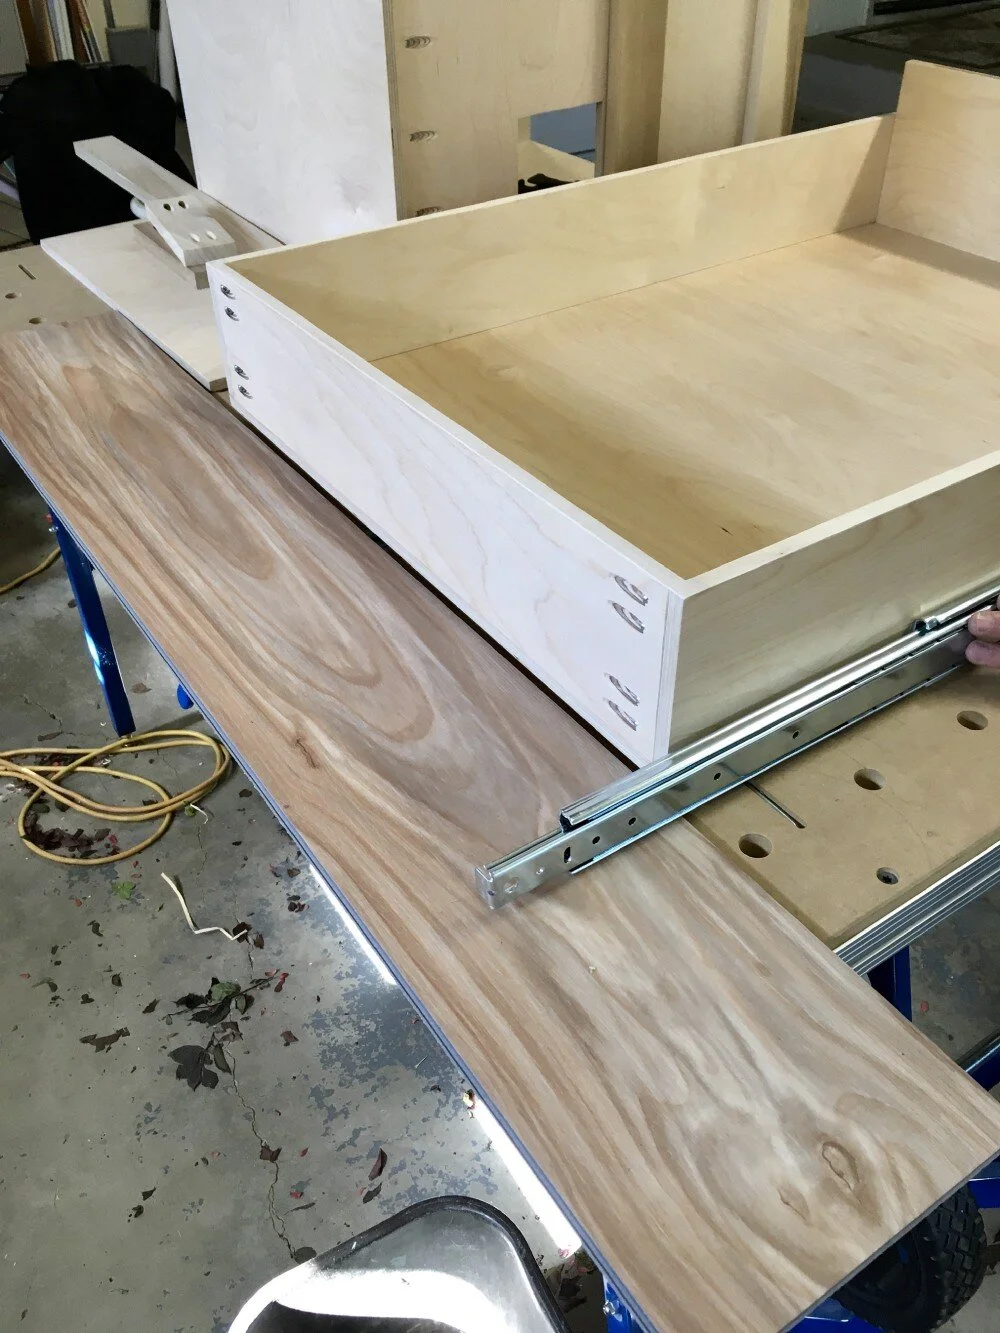
The “garage” drawer, which is going under that platform, has a high back to keep things from getting trapped behind it. We used a piece of the actual flooring I’m going to use (isn’t it pretty?!) to make sure the drawer would have clearance when installing the heavy-duty slides.
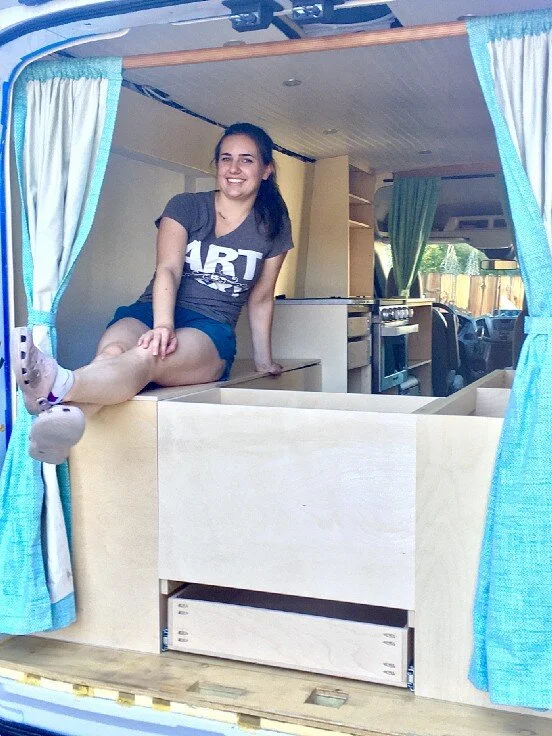
In the background of this picture, you can see the sink cabinet in the early stages.
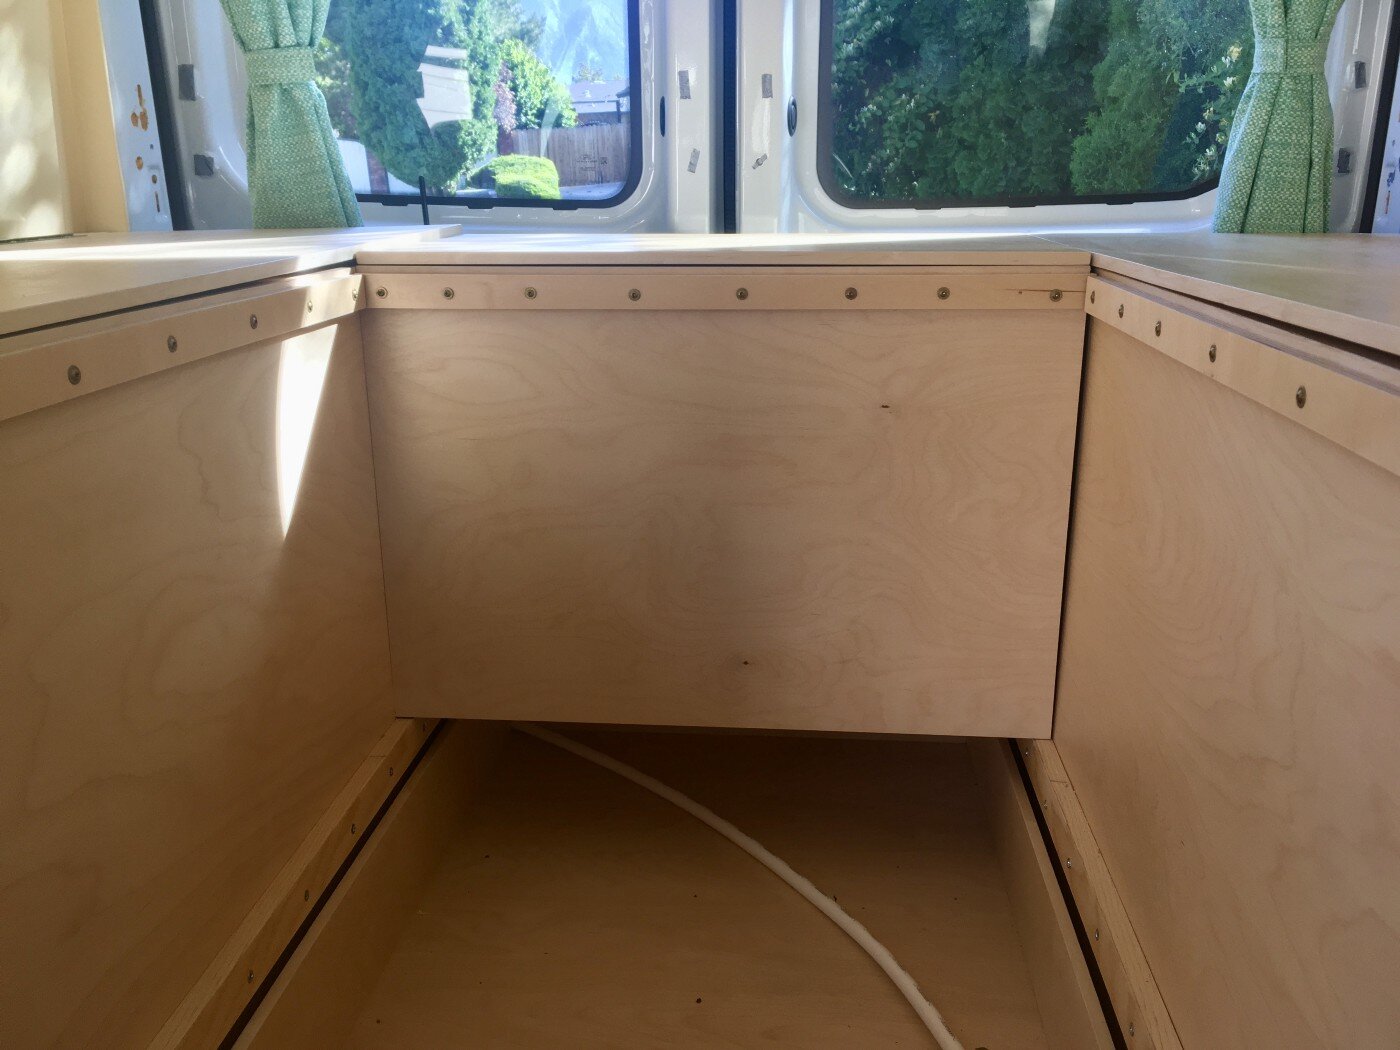
In the pictures below, you can see the back bench in its early stages on the left, and the back bench and garage drawer installed on the right. We kept the back bench simple: a bottom and two sides, with cross-beams in between, installed between the two side benches.

Finally, I had to put another cleat around the rim of the benches for the table to rest on when the dinette is in “bed” form.
Making the Cushions and their Covers

I bought a 3" charcoal memory foam mattress pad and cut it into pieces to fit over the benches and (once it’s finished) the table, in order to make the bed. And I decided to sew the cushions myself, which, you know, my seventh-grade home ec. class totally prepared me for (note the sarcasm here), but I read the instructions for my mom’s 20-year-old sewing machine and found a good tutorial online and made it happen. I used Signature Series Velvet Home Decor Fabric in Stone from Joann’s, Gutterman Sew All Thread and Schmetz needles, and finished the open edge with brown double-fold bias tape.

Sample cushion covers I made for practice.

Me laying out the completed cushions in the van
Playing Catch Up
Looking over what we’d done so far, Super Dad and I realized there were a few things in the cabinets we’d already finished and installed that still needed doing. Dad wanted me to install a propane gas alarm near my tank, and the only ones we could find were wire-in, which meant I would need to remove the oven in order to connect the alarm to that circuit.
Meanwhile, I’d discovered wood edging tape, and had started using it to finish practically everything. Which left the early cabinets looking shabby by comparison, so I wanted to remove the countertops and oven to apply edging to those and finished them with the stain and polyurethane I’d finally settled on.
So we got it all taken apart, and I spent a day fixing it all up and making sure there weren’t any other issues that needed taking care of.

The cabinets with the edging tape and stain, and the new wiring for the propane alarm in the back of the oven space.
Picking Up Steam
Things are all a little out of order at this point, but that concludes a few more sections of the build! On my next post, I’ll get you up to speed on the upper cabinet (SuperDad had an amazing idea), the water cabinet (if you predicted this one would be a total nightmare, congratulations), and the table (I’m obsessed with how pretty it’s turning out).
For me, the last few steps of the build will hopefully come together in the next few weeks. All that’s left to do is the top floor, finish installing the water cabinet (unfortunately I’m waiting on parts), finish the cabinet faces and install the catches, and install the table.
At least, that’s all that’s left as far as major parts of the build are concerned (things that really need to happen for me to realistically hit the road). I’m still missing a wall on the sliding door, and we’re hoping to install crown moulding to help support my ceiling and cover up the rough edges. Plus there are a plethora of mini-projects, like making a cover for my electrical panel and installing hooks behind my driver’s seat.
Honestly, I doubt my work on Danica will ever be completely finished. But that’s fine with me, I kind of like having a little project to do with my hands. The goal here is to get her road-worthy and life-supporting.
And then it’s next stop: everywhere.
*This post does contain affiliate links, which I make a little profit off of any time you use them to get to Amazon and buy a product. This is absolutely at no additional cost to you. If you use one of these links to get to Amazon, but buy something other than the product I’ve linked to, I still make a small amount for sending you their way, so if you love this blog and happen to be buying something on Amazon, anyway, taking a detour through this site is a great way to support me and Danica. Thanks!