Making Great Headway
I didn’t get off to a great start with my New-New Plan. Neither the walls, nor the ceiling were fully installed by June 15th, and I hadn’t sealed the subfloor by then, either. Not a great start, but I’ve made up for it a bit this week.
With a hard leave-date set, it’s more important to me to get things done than to get them done perfectly. I’ve had little bouts of “I don’t care, I just want it finished” over the last few months, usually lasting just a day or two, which helped me get a lot done in a shorter period of time, but I always fell back into that perfectionist mindset afterwards and slowed down again. But staring down the time crunch, plus being over the hump of the build and getting closer to actually finishing, plus finding a friend to join me for those first couple weeks, has squarely put me in the “who cares if it’s perfect so long as it’s done” mindset.
Dan was able to come by on Monday and give me some pointers on hooking up the remaining electrical, so I spent the afternoon hooking everything up and throwing in the last of the walls. My mom was a big help, and I couldn’t have gotten it all done in one day without her.
The walls fully installed! (Notice: no square holes.)
I spent the rest of the week working on the ceiling, starting to prep the walls for painting, and sealing the subfloor. All-in-all, it went well, and I’m excited that my ceiling is coming together how I imagined it.
First few ceiling boards going in at the back of the van
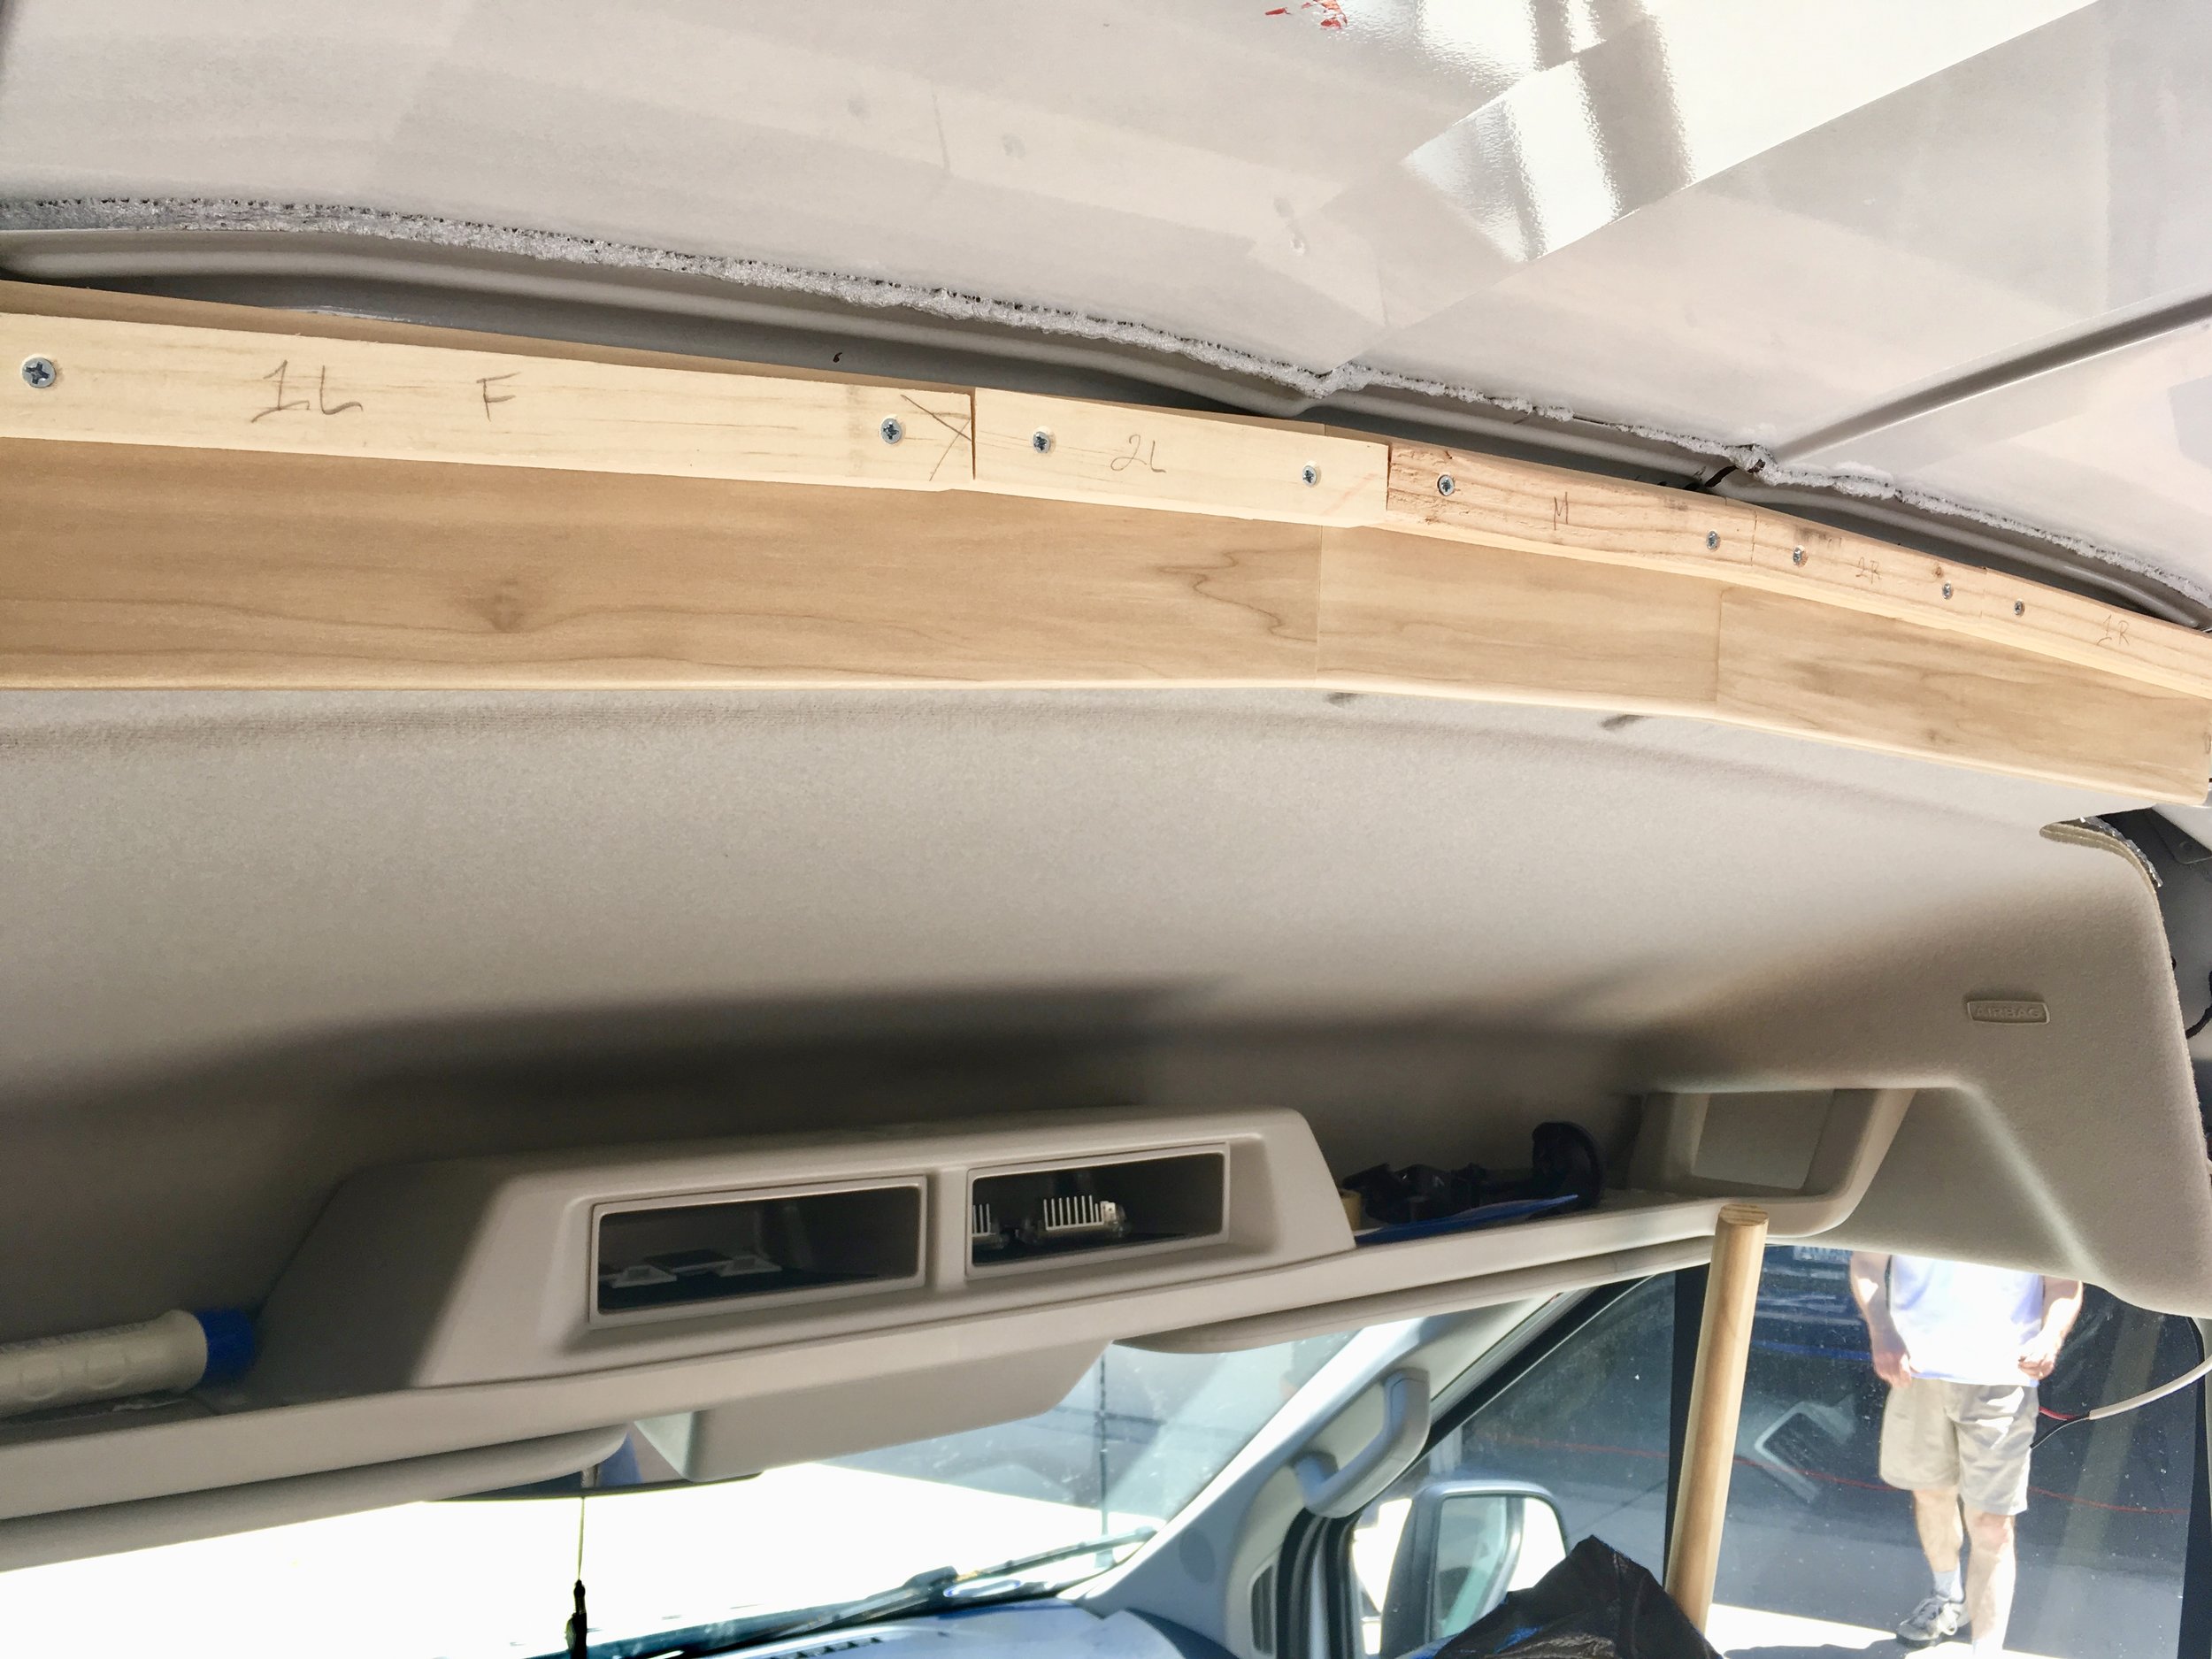
The one real problem was the front arch of the van, just in regard to how I’m going to attach the ceiling panels on that end. SuperDad and I have bounced around a lot of ideas regarding this one, and eventually decided to attach furring strips to the top of a header board, work around the foam blobs, and attach furring strips to a couple of weird metal bits that were sticking out on the sides. This was a lot less complicated than most of our other ideas, and actually came out looking really nice. I used a poplar board that I got at Home Depot, which was actually pretty cheap, cut it into three pieces to match the arch of the van roof, then fused them back together with wood glue and a strip of plywood backing. I sanded it all down, gave it a couple of coats of clear polyurethane sealant, and voilà! A beautiful header to both support my ceiling and beautify the transition from the cab to my house. Now I just can’t wait to get the ceiling finished and see how it all comes together.
The poplar board after the polyurethane sealant dried
We used three screws to mount the header to the van, and then covered those screws with the furring strips for the ceiling.
Once that was in, the foam blobs went back up, painted to match my walls by my lovely mother!
Furring block in front of the foam blob.
I’m actually pretty hopeful that the ceiling will be pretty close to finished by tomorrow.
I do want to paint before installing any cabinets, so that will be next on the to do list, and then we’re going to start with the kitchen. The battery is going to go in one of the kitchen cabinets, and I can’t wait to get it installed so I can run my vent fan and cool things down a little while I’m working.
Isolator wire on the bottom right, tucked out of the way.
I also ran into an issue after putting the walls up: I’d forgotten about the wire for the battery isolator. It was there, behind the wall, with no hole. It had just been tucked out of the way, amongst the insulation, for so long that I’d forgotten it was even there until I was vacuuming and saw the isolator sitting under the drivers seat.
For about 60 seconds I felt like I was going to pass out with horror, but the solution is pretty obvious and not that big of a deal, even if it wasn’t going to turn out super pretty. Just cut a hole and fish out the wire.
Square hole with the wire behind it.
Luckily, I’ve been taking pictures of everything behind the walls so we’ll be able to nail into the furring strips later on. I could quite clearly see the wire in the pictures, and was able to use my multitool to (very carefully) cut a square hole and pull it through. Not a big deal, ultimately, but it certainly felt like a catastrophe.
It also means I wasn’t able to put the hole exactly where I would have wanted it. There was a furring strip in the way, and I couldn’t just put a hole on the other side because it would have been impossible to fish it through. So now the hole is inconveniently right where the edge of my cabinet is supposed to be. Not much to do about that, but I’m sure we’ll find some way to make it work. Again, I’m much more interested in finishing the build than finishing it perfectly, at this point.
In my next update, I plan to talk some more about my upcoming travel plans, hopefully announce that the ceiling is finished, and give you a cabinet update in my next post. And don’t forget, you can follow me on Instagram @thecarsoncosta to see even more pictures of the build!


